Hello mate, if you have been using Xenforo for some time, you pretty well know that there is an option to add your social media links in your profile setting. By default, you only have SKYPE, FACEBOOK, and TWITTER options. At the same time, you can simply add more options by adding the user custom field (shown later in this post).
By default the links are shown on your profile as simple text like the below:
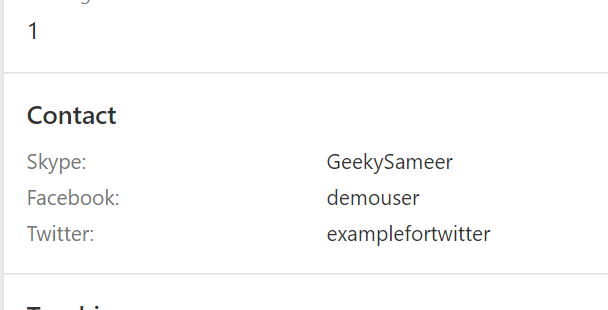
But these are pretty useless, coz you cannot click on them. You must copy the username and search for them on social media.
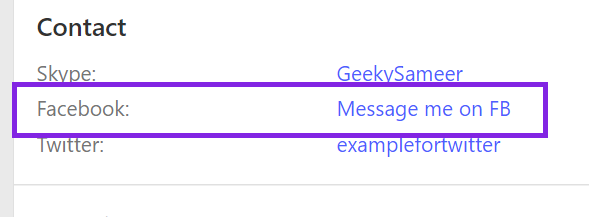
Today we are going to solve this problem. We are going to convert these social media links to clickable links. Like this:
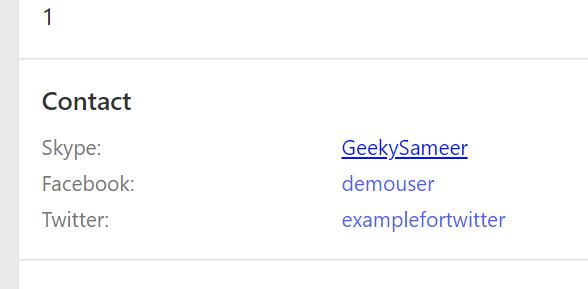
Any user will be available to visit the required links just by clicking on the usernames.
Let’s start!
Skype
We will use HTML hyperlink tags to create a link to users’ social media.
Goto ACP->Users->Custom user fields-> Skype. Scroll down to General options and inside “Value display HTML” add the following code:
<a href="skype:{$value}" target="_blank">{$value}</a>
The code is pretty much straightforward. We have created an HTML hyperlink tag that will point to the skype username where the {$value} will be the username inserted by the user under their account details.
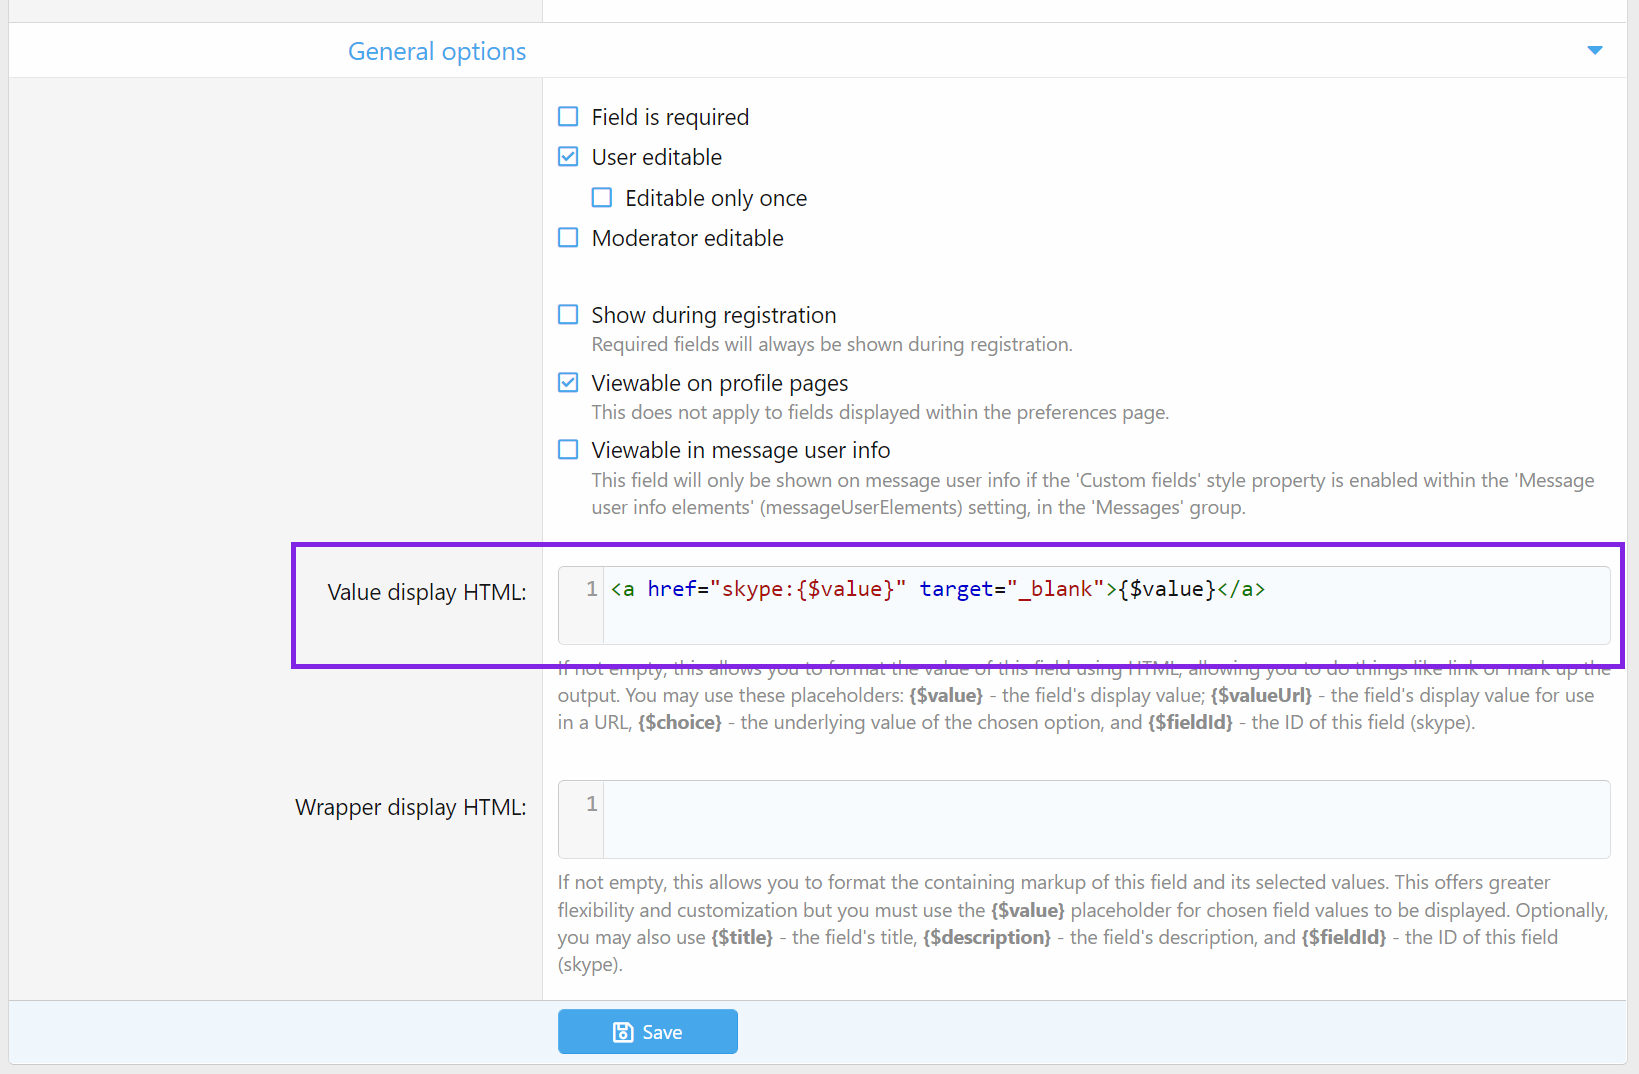
Click Save.
You can check it by adding your skype username to your account details.
Let’s do this for Facebook. This one is tricky due to Facebook URL behavior.
You cannot create a hyperlink to add a user’s FB username since FB URLs are different based on user settings. It sometimes shows profile id as numbers whereas sometimes it shows as usernames.
URL with numbers example: https://www.facebook.com/profile.php?id=1000000000431
while another version: https://www.facebook.com/geekynotreal.75
So it’s not feasible to create hyperlinks for such. So we will create a universal link where users need to enter their whole profile link. And we will display the link OR a “Message me of FB” title.
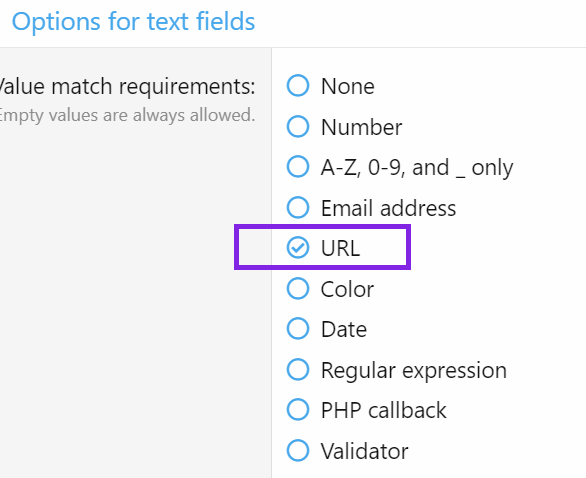
Goto ACP->Users->Custom user fields-> Facebook.
Under “Options for text fields” select “URL“.
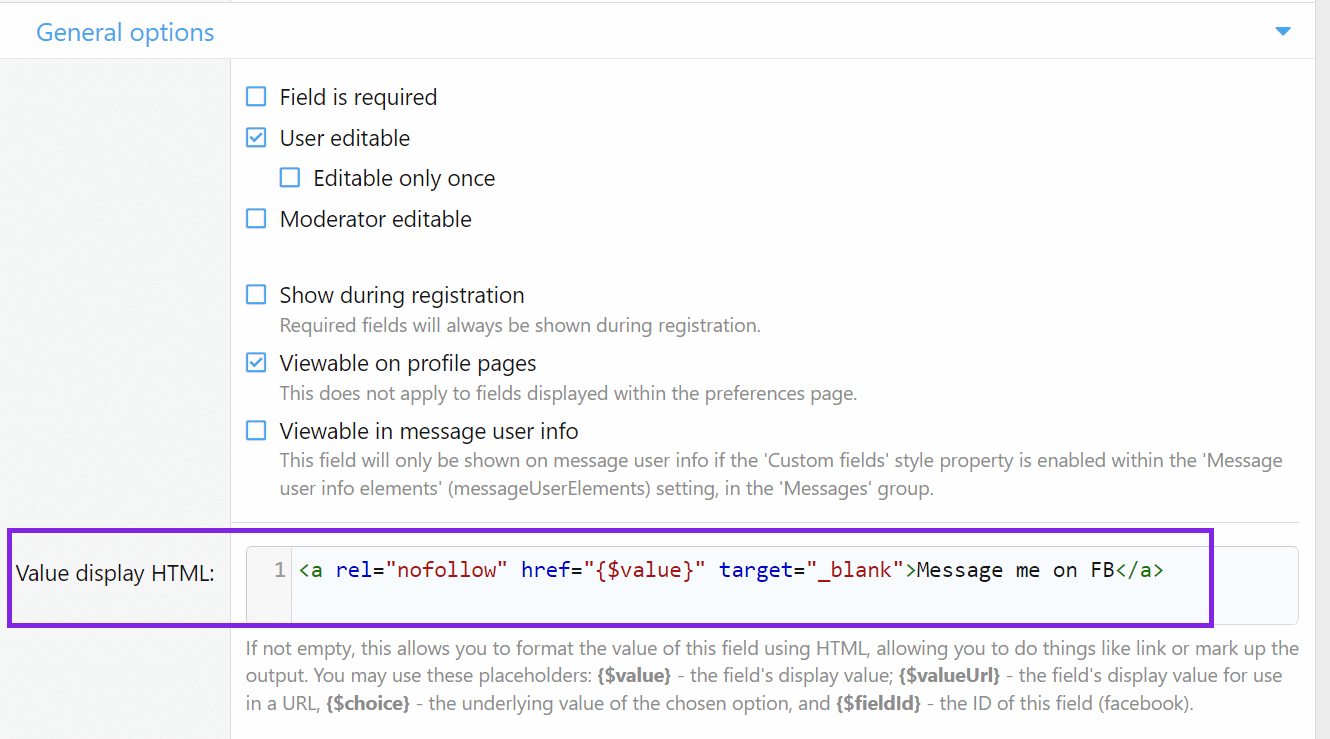
Scroll down to General options and inside “Value display HTML” add any 1 of the following code:
<a rel="nofollow" href="{$value}" target="_blank">{$value}</a>
Result:

OR
<a rel="nofollow" href="{$value}" target="_blank">Message me on FB</a>
Result:
Click Save when done.
Now let’s do this for Twitter:
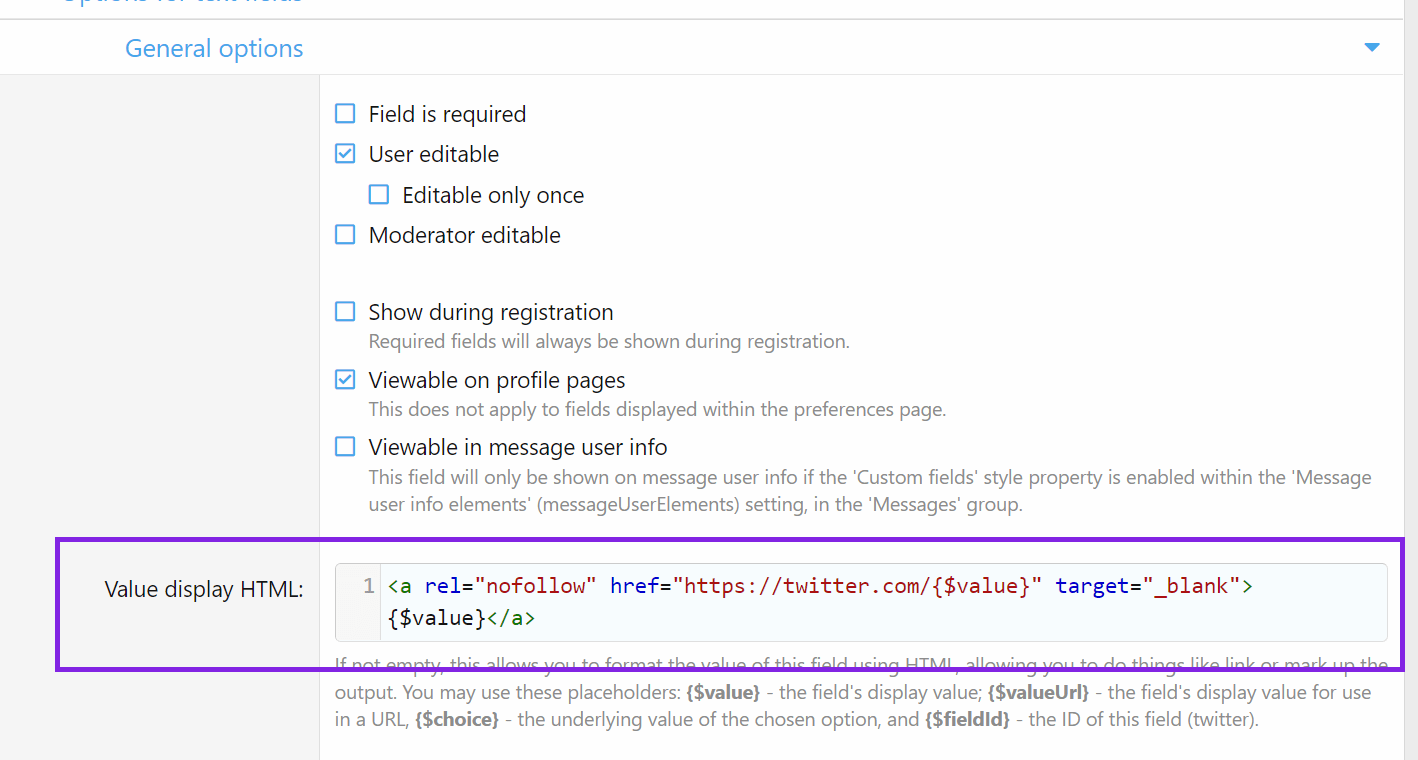
Goto ACP->Users->Custom user fields-> Twitter. Scroll down to General options and inside “Value display HTML” add the following code:
<a rel="nofollow" href="https://twitter.com/{$value}" target="_blank">{$value}</a>
Click save when done.
Now its time for Instagram
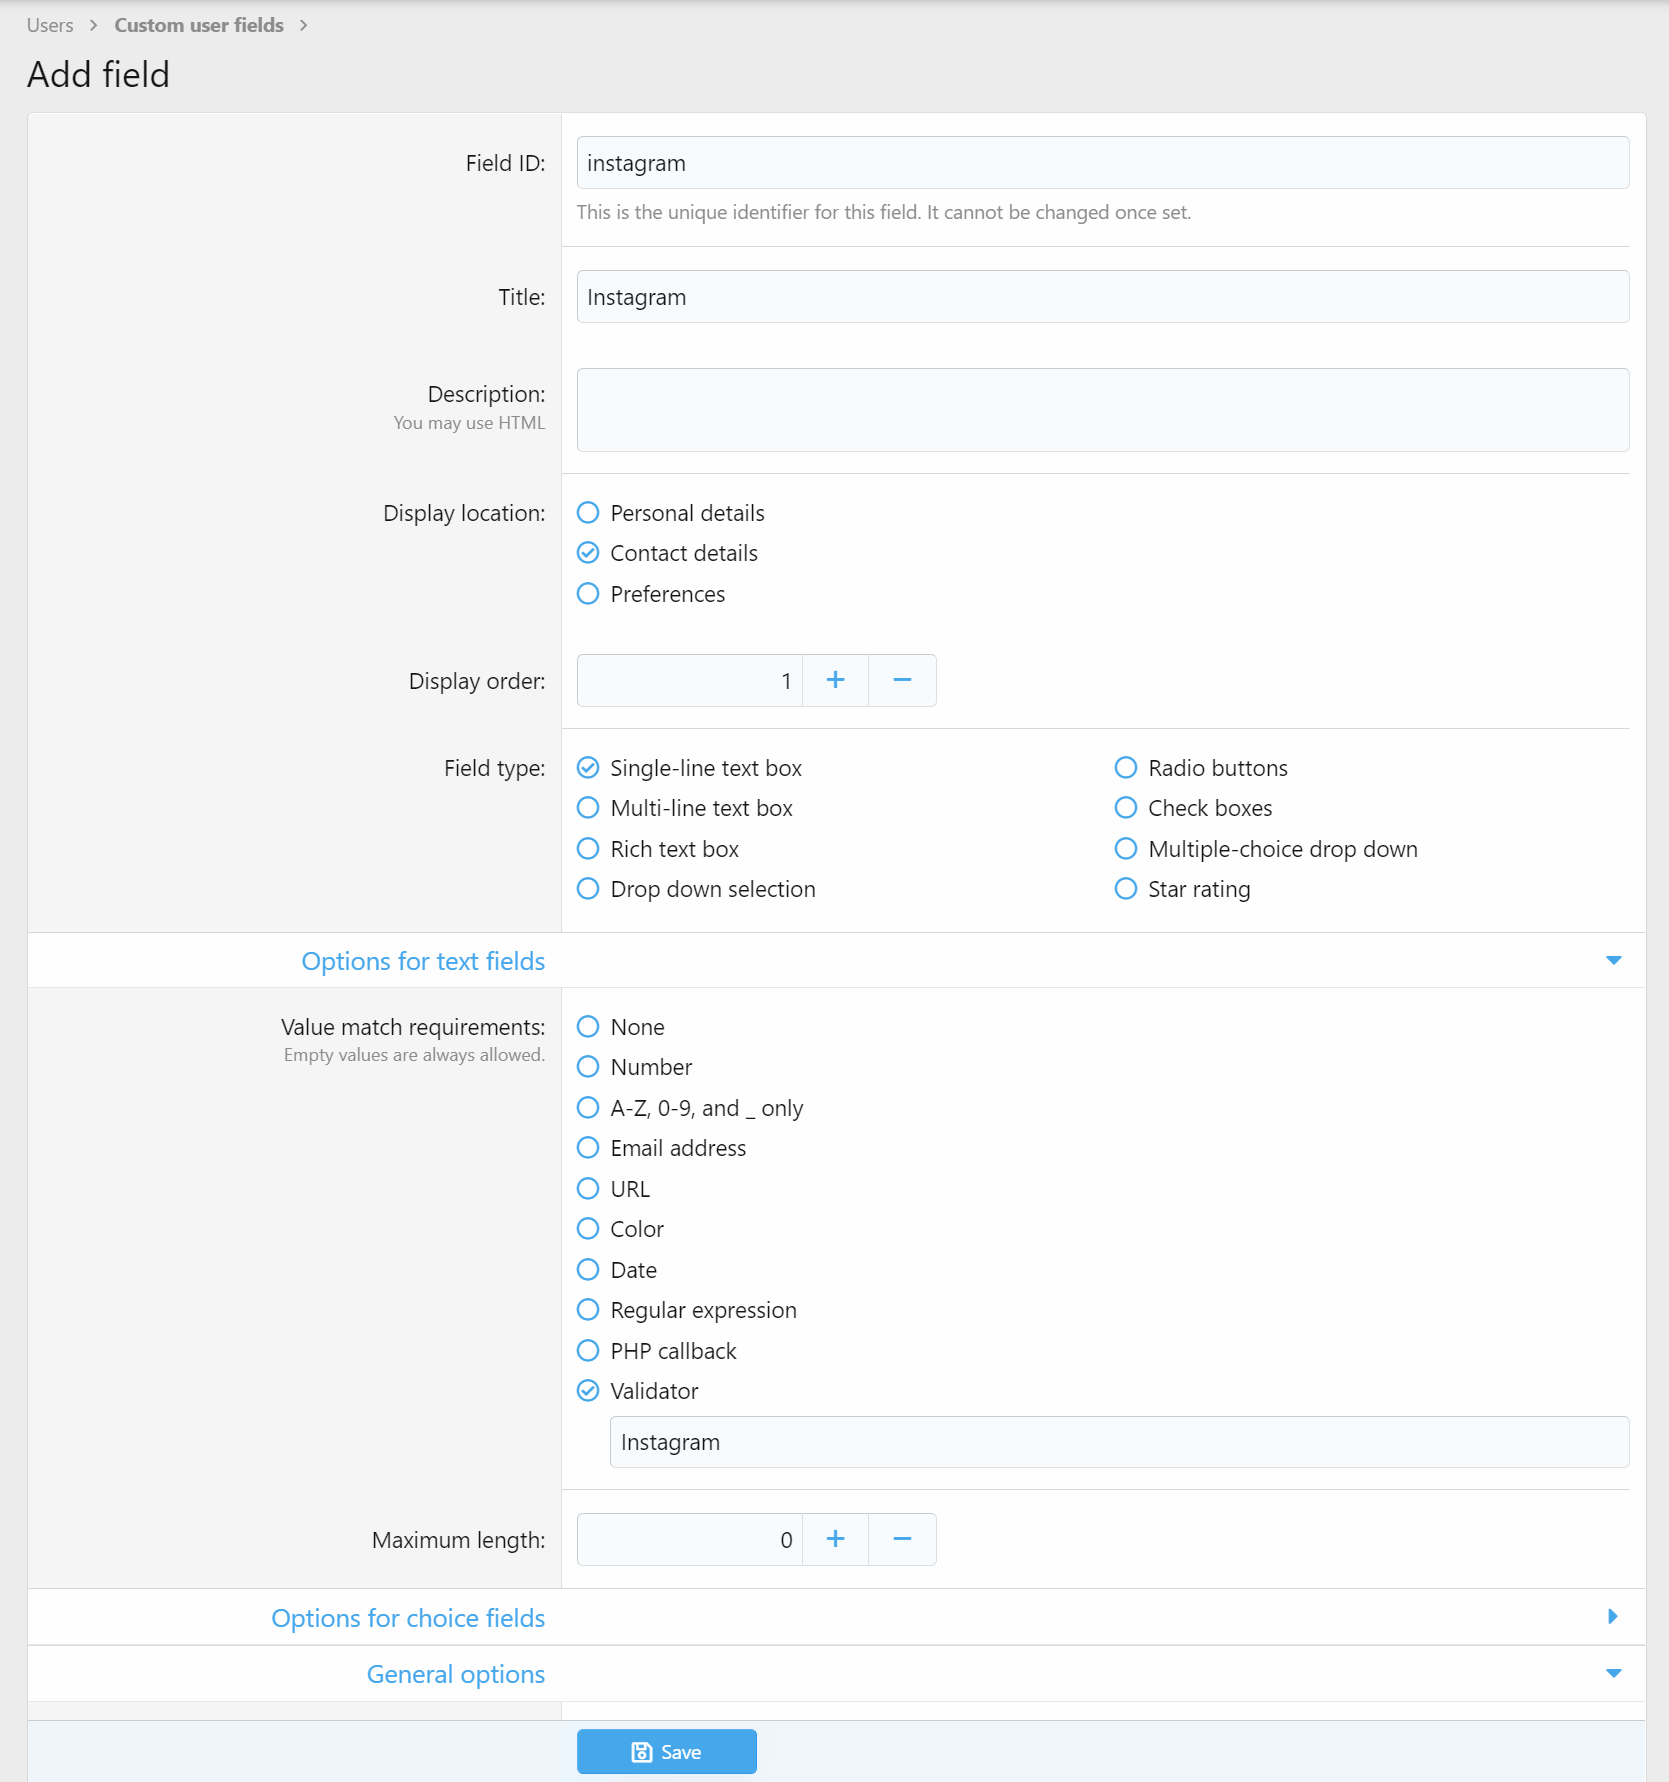
Start with adding a new custom field. Goto ACP->Users->Custom user fields. Click +Add field.
I kept the Display Order as 1 so that the Instagram link should be shown on top of the user profile.
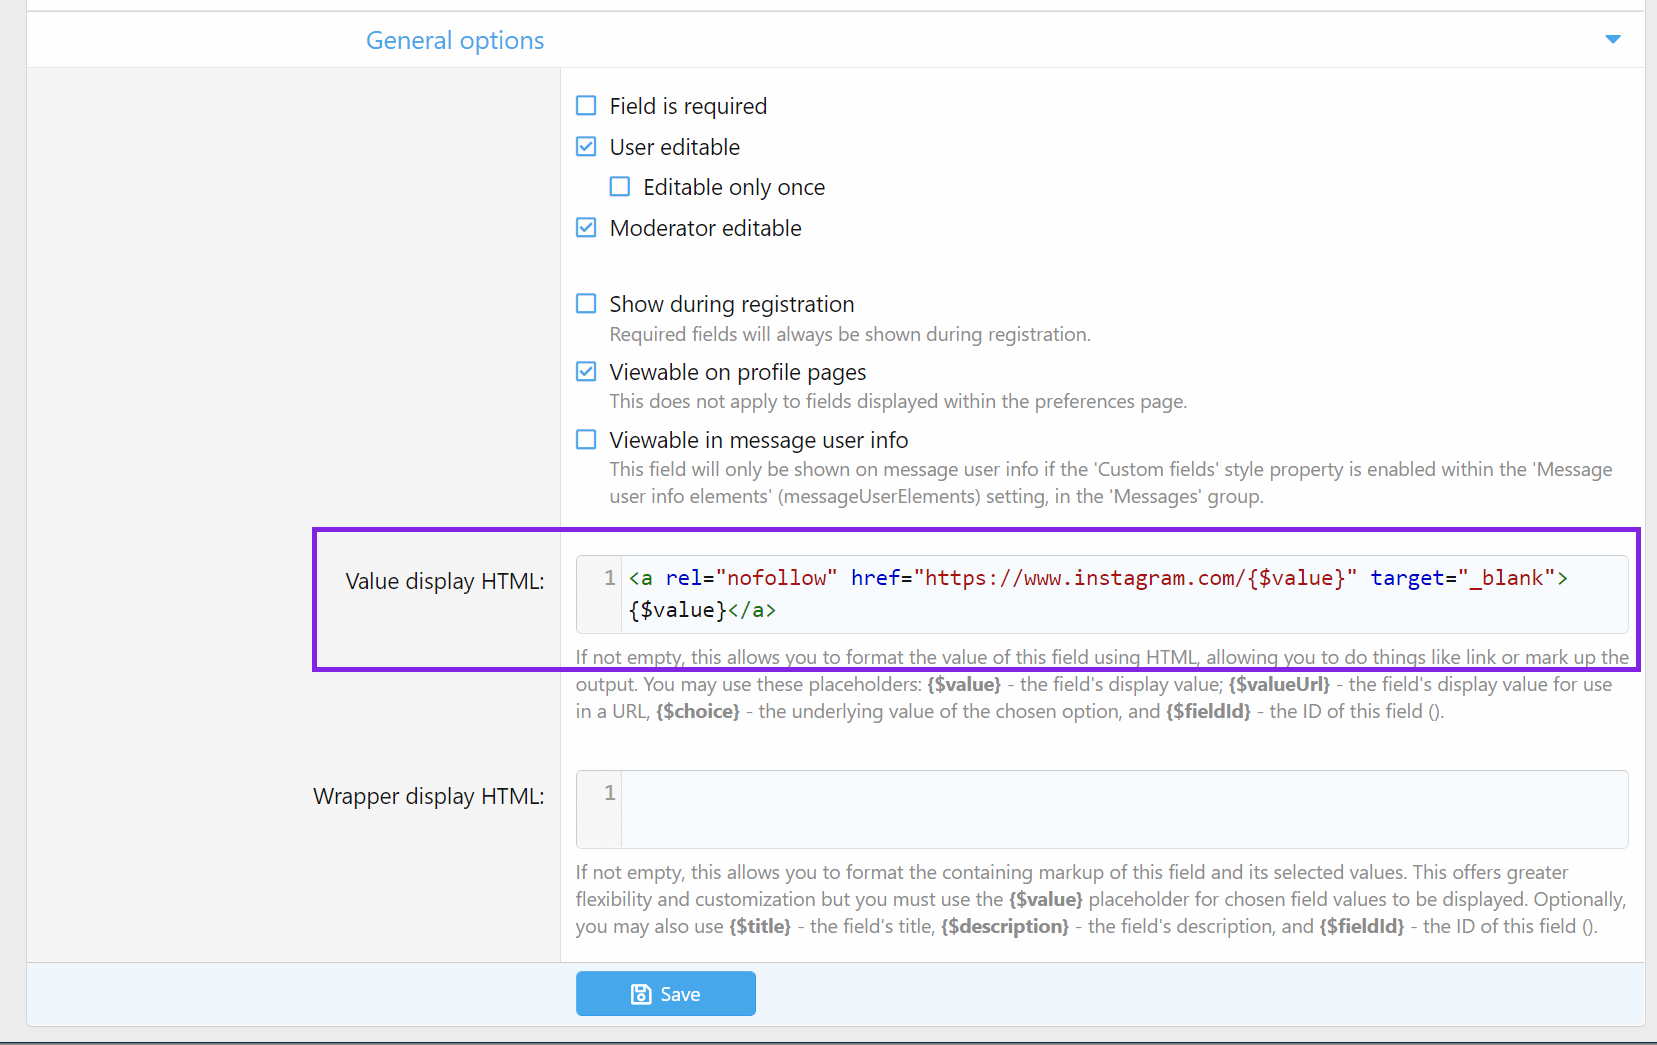
Result:
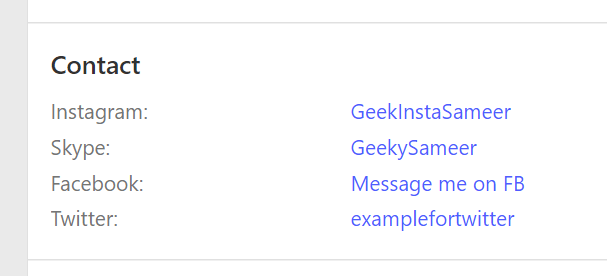
I guess you have understood the logic behind this now.
Likewise, you can create multiple user fields and use the codes to display the social media links.
You can further customize the looks of the links using CSS.
That’s all for this post now.
Thanks for reading it. If you have any doubts, you can comment below.

