Today we are going to learn how to install Xenforo, the process remains the same for Xenforo 2 installation.
Preassumptions
Before starting the installation process, I assume that you already have all the things ready that are required to make a xenforo forum. Below is the list you should get ready before beginning the installation.
- Domain Name
- Hosting Server
- Xenforo Software
- Style (Xenforo theme)
If not, you can check this list of all the required things to build a perfect xenforo forum.
In short, here’s the checklist
For domain, you can check this list of all domain registrars with the best offers.
The Hosting Server plays an important role in the performance of the forum. Choose your hosting wisely. For the test, we are using Bluehost shared hosting. They are cheap and perfect if you are just starting your journey.
Else you can check out this list of best hosting services for your site.
Xenforo Software: Download Xenforo from your Customer Area.
Style: You may have already decided on the style you want to use on your forum. If not yet, you can see this list of the best xenforo styles for Professional Looking Forums and decide what suits your need.
Let’s start with the Xenforo Installation process:
How to install Xenforo
Setup database
We will 1st start with creating a database and MySQL user to store the data of Forum.
Create New Database
Login to your Cpanel and go to the database section
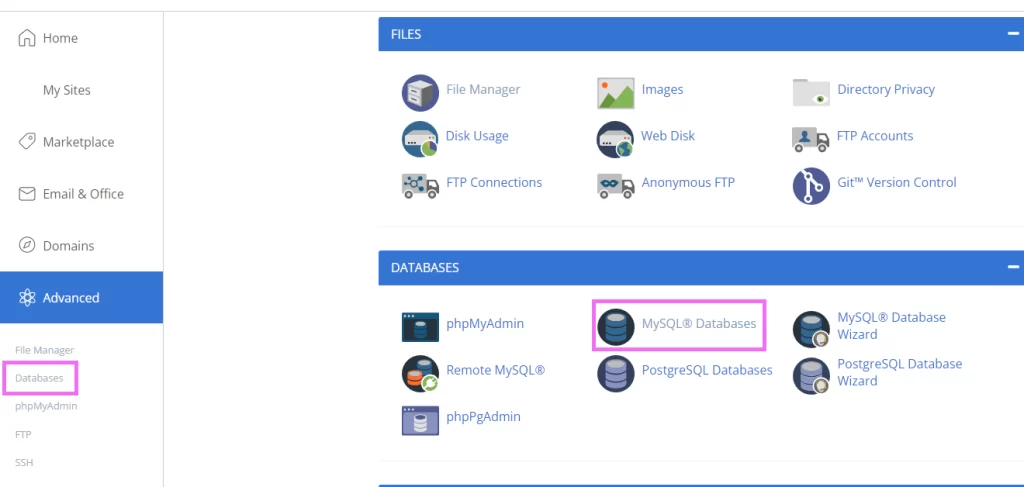
Click on MySQL Database.
Now create New Database. (Note down all the database details from here. You gonna need this while installing the software.)

Enter your preferred database name. Name it something that you can easily distinguish from other databases.
Now depending upon the hosting, you might have some prefix in the grey area (I also have a prefix, but hide it for tutorial purposes). Note down the complete database name along with the prefix.
Click on create Database.
Create a New MySQL user
Now scroll down you will see an option to create a MySQL user.
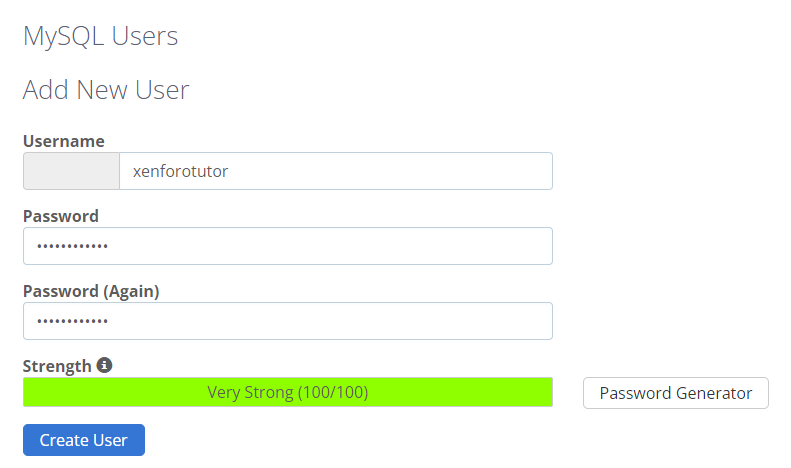
Note down the username(including the prefix set in the grey area) and password. Click on create user.
Connect User and Database
Now that you have created the database and MySQL user, it’s time to connect both.
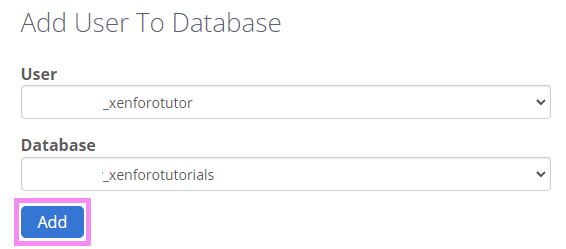
Scroll in the same section you will find the option “Add User To Database”. Select the newly created user and database. Click add.
On the next screen, you will see manage user privileges. Give all the permissions and click “make changes”.
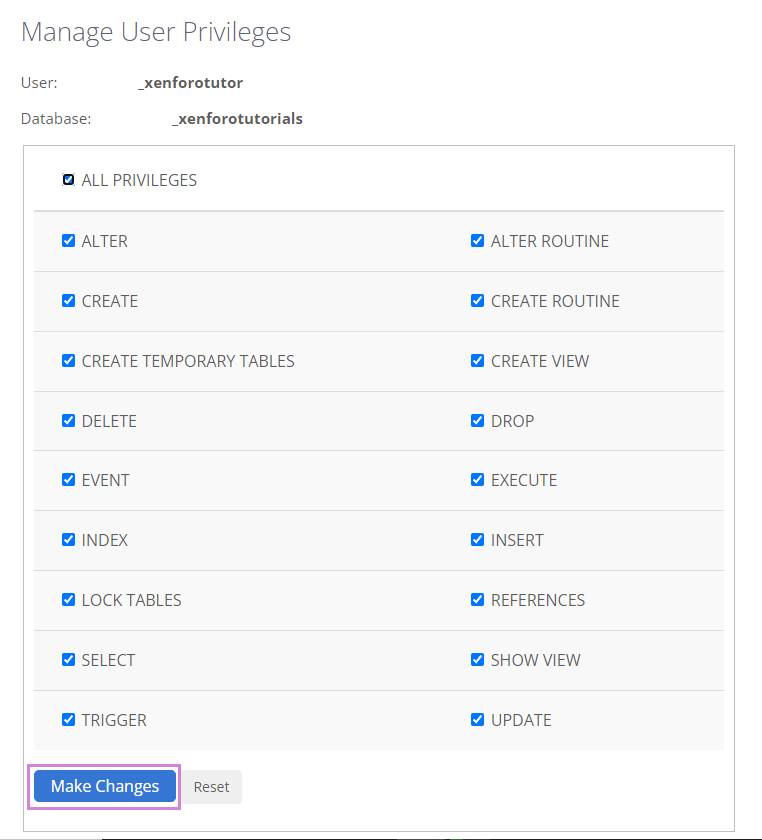
You are done with the database part here.
Upload Xenforo to hosting
Now it’s time to install Xenforo.
Upload Xenforo
Download the latest version of xenforo from the customer area.
You will get a Zip file of the Xenforo Software. Unzip it. There’s another zip file named upload.zip

You need to upload this upload.zip file on your hosting. Let’s see how
Login to your Hosting account and open Cpanel. (I am assuming that you have already assigned your domain and hosting. If not read how to assign your domain). Note:- If you want to install xenforo on your subdomain, you need to create a subdomain and assign it to your account.)
For the main domain, you have to upload this upload.zip file to the main domain folder (which can be found at public_html/yourdomain or directly under public_html), similarly for the subdomain you need to upload the files to the subdomain folder (public_html/yoursubdomain). For the tutorial purpose, we are using a subdomain of our website: https://xenforotutorials.geekysameer.com (this forum is just for tutorial purposes, not for general users)
From Cpanel go to File Manager.
Locate your subdomain folder under public_html
For instance, I will upload it under public_html/xenforotutorials since I want my forum on a subdomain.
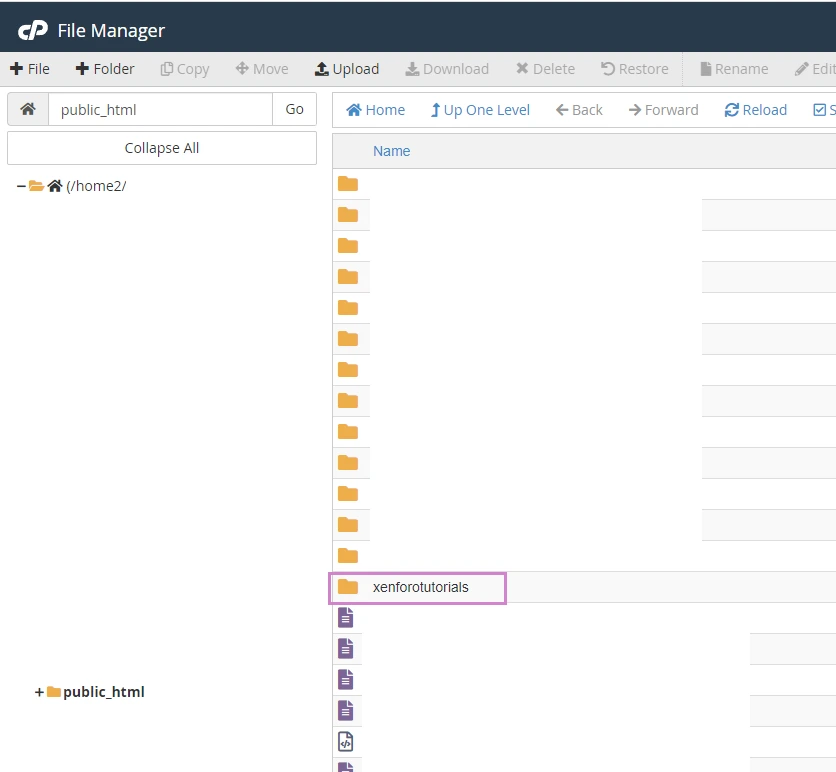
Double click to open your folder. Now click on the upload option from the menu above.

On the upload page, click the select file and locate the upload.zip that you extracted. Upload it.
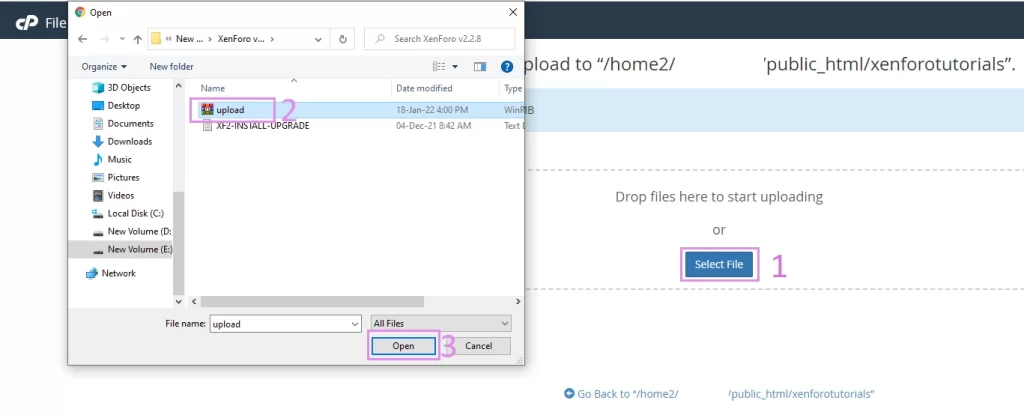
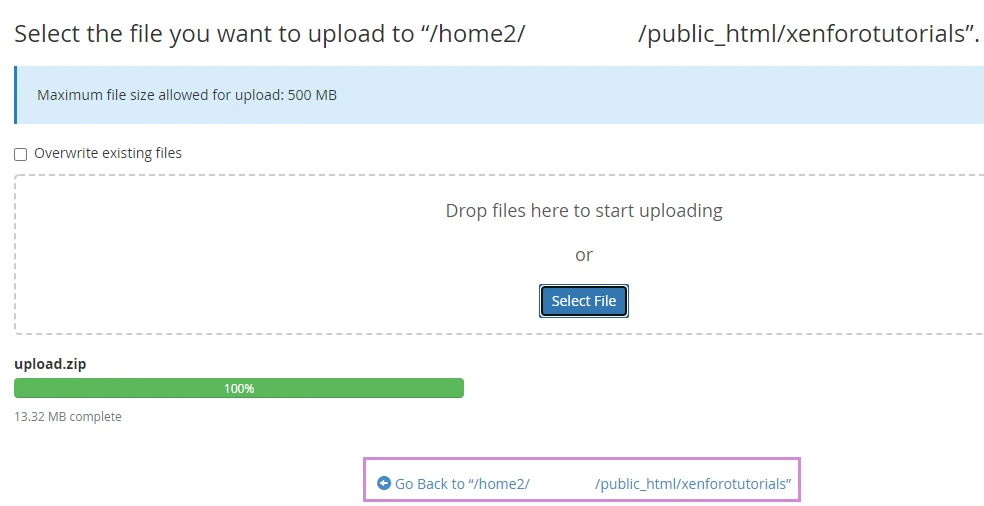
Once the upload is completed, click the go back button below.
Right-click on upload.zip and extract it, this will extract all the files under a folder named upload.
Now delete the upload.zip file since we don’t need it now.
See the below image for reference
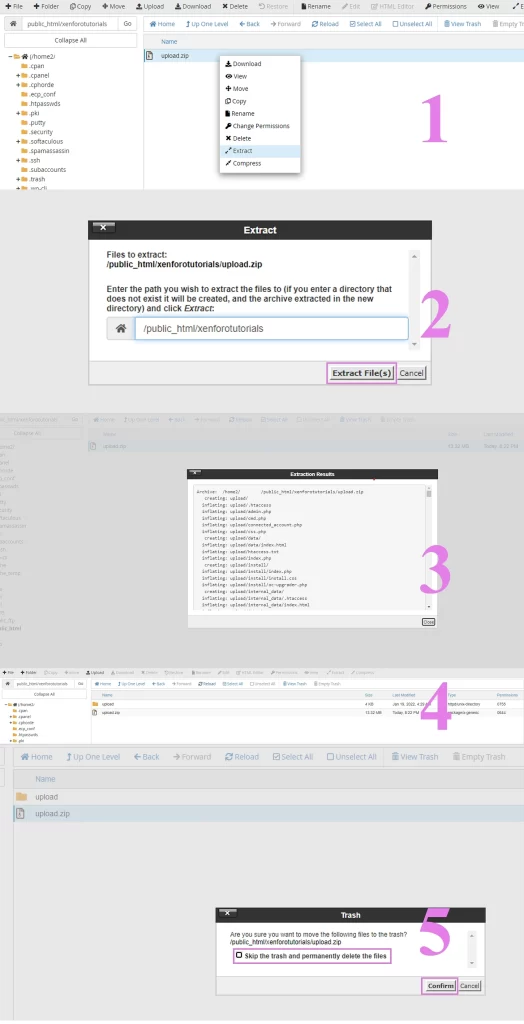
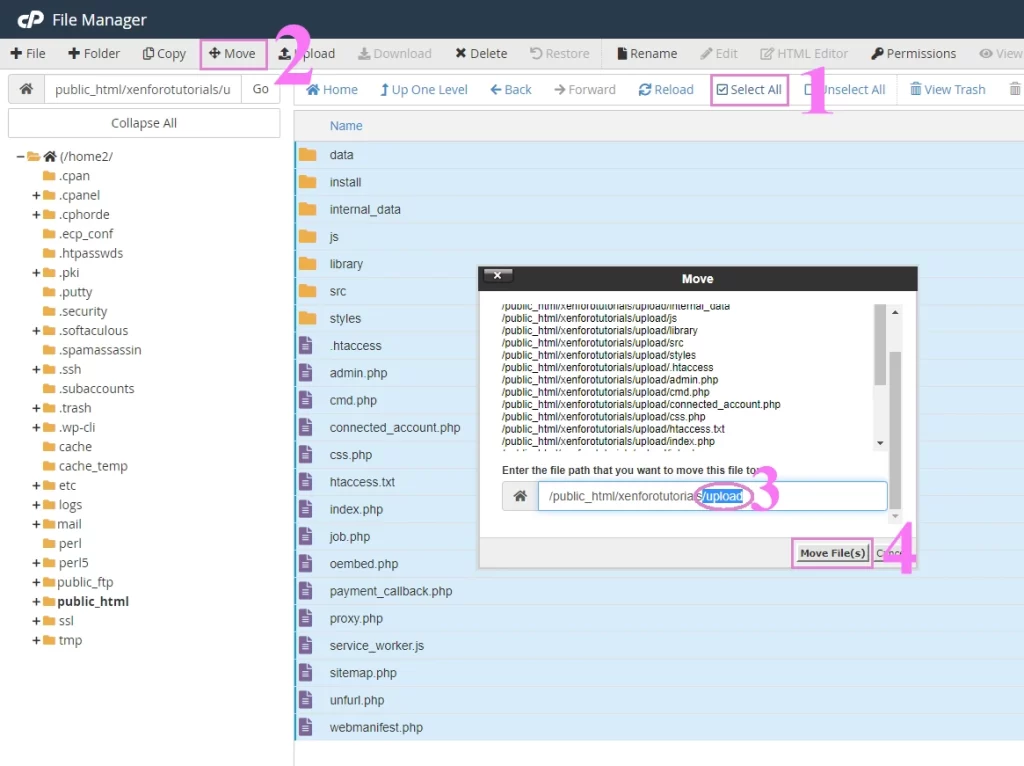
Now that you can see, the contents are under the upload folder. We don’t want them to be inside public_html/xenforotutorials/upload instead it should be under public_html/xenforotutorials. So now we have to move the files from the upload folder to the main folder.
Double click to open the upload folder. Click “select all” from the file menu and click move from the main menu. Be sure to remove /upload from the moving folder. (check below image) the path should read public_html/xenforotutorial
Done with all the hosting work, now it’s time to install the Xenforo forum.
Install Xenforo
Open a new tab in your browser and point the URL to your forum URL.
for e.g: https://xenforotutorials.geekysameer.com/install this will automatically begin the installation process. In case the installation doesn’t start, verify that all the above steps had been performed correctly.

Click Begin Installation, and follow the onscreen instructions. Keep clicking next/continue until you reach the configuration builder page.
Here you need to enter the details of the database and MySQL user we created above. Keep the default value as they are.
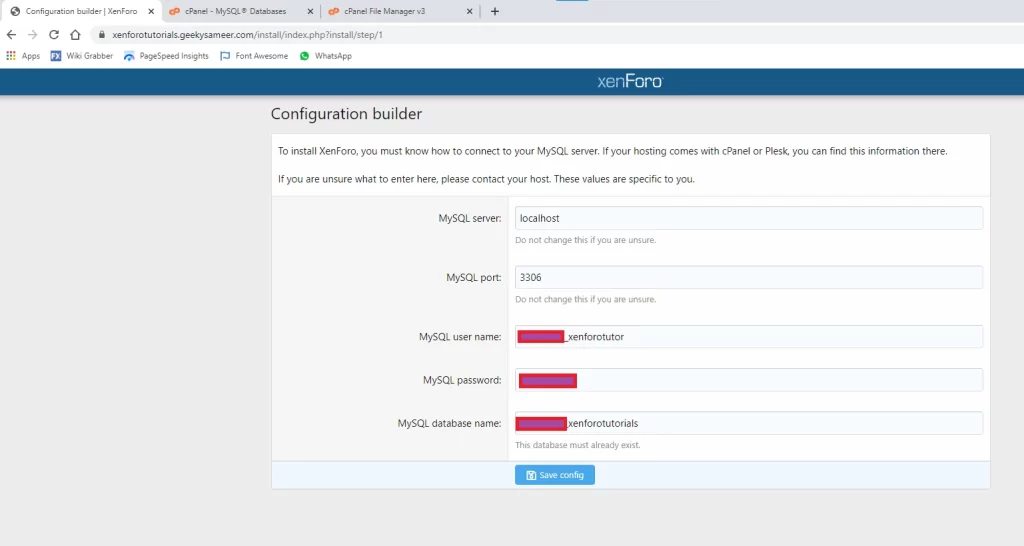
Click save config.
Wait for the process to complete.
Now you will be prompted to create an admin user. Give your details of admin id.
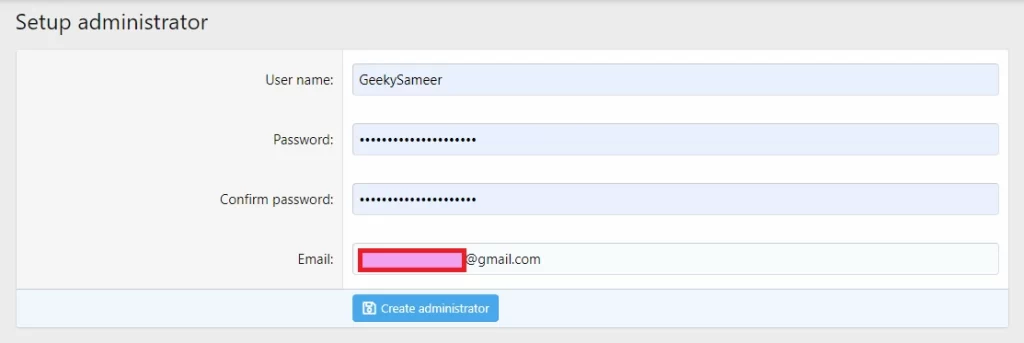
Click create administrator.
On the Next screen, you need to provide your forum URL and contact email address.
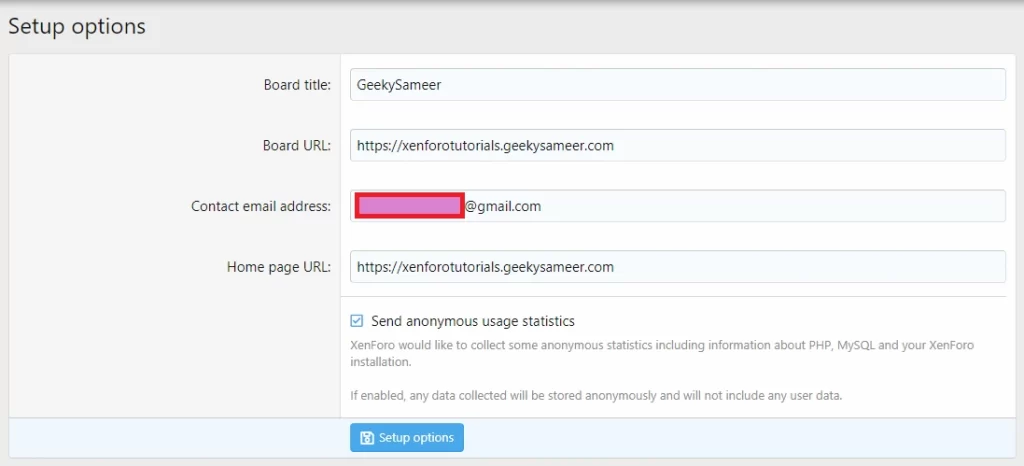
Click setup the options.
Done.
Wait for the process to complete.
Once done you will be taken to the admin login page where you can log in to your admin panel of xenforo.
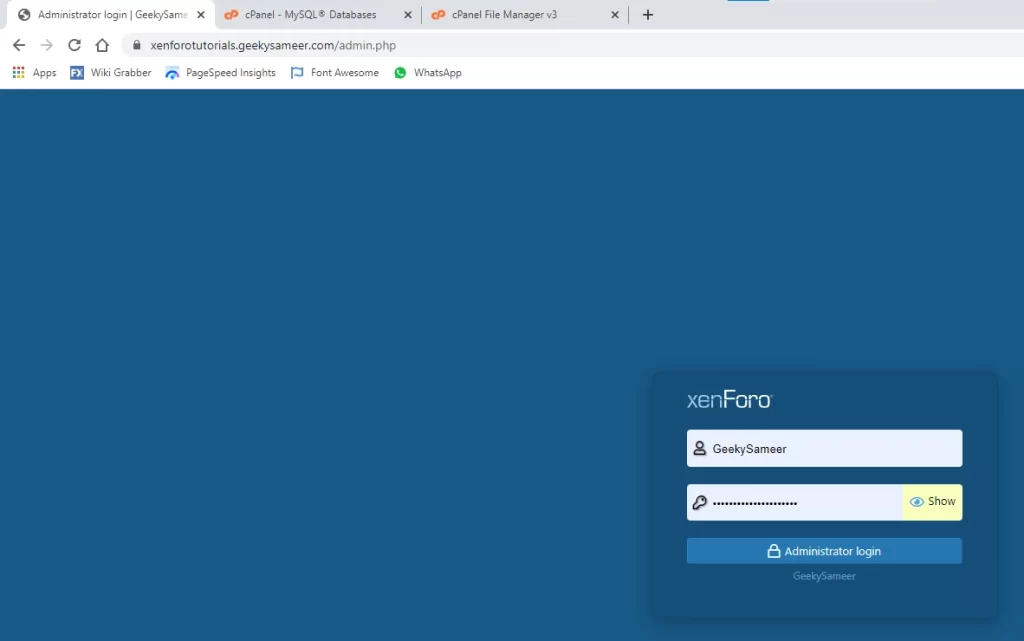
You can also manually go to the admin panel by adding /admin.php at the end of your forum URL. Check the above image URL.
Enter your Username and Password to enter the Admin Panel.
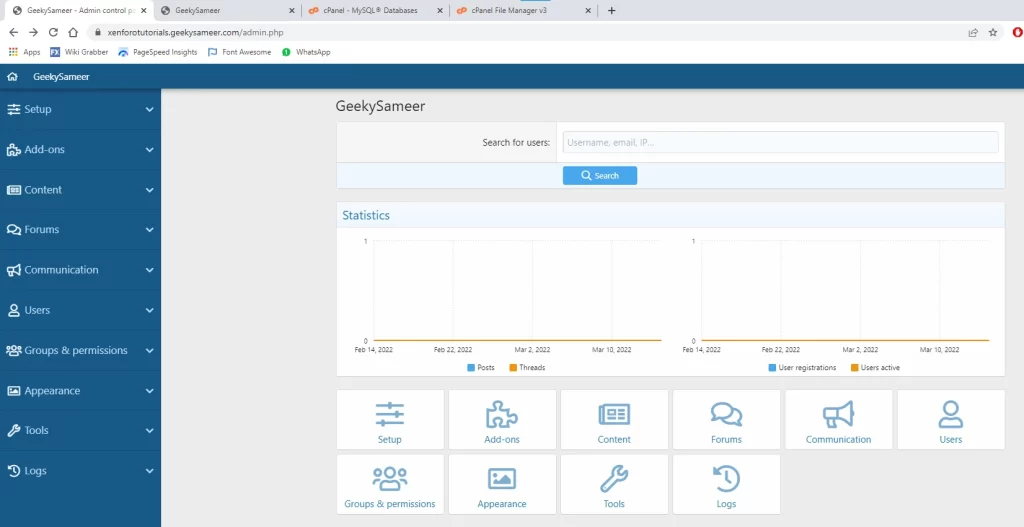
With this, we have learned to install xenforo from scratch.
Moreover, you can find the official docs here: https://xenforo.com/docs/xf1/install-upgrade/
Read more Articles related to Xenforo:
How to connect Xenforo and Google Adsense?
How to connect Xenforo and Google Analytics?


